


Screencast: Best Practices for Focus Stacking Using Zerene Stacker and Photoshop
re: panorama
re: videos by Lloyd
At my Patreon account (by subscription) in Pro Photography Workflow:
Focus Stacking: Best practices for Optimal Results
UPDATE: also available in diglloyd Making Sharp Images: Focus Stacking: Best practices for Optimal Results
Best practices walkthrough of my end-to-end process for focus stacking. BProcessing the RAW files, layering for evaluation, retouching approach, display considerations, etc.
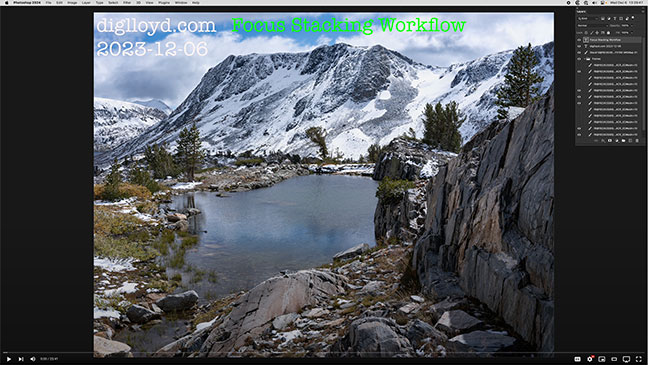
Photoshop screen showing to start
- switch to Finder, show originals and TIF
- enhanced raw files, 16-bit TIF output, DMAP result
- previously figured out processing
- frames layered to winnow out any unneeded ones
- toggle DMAP vs first layer
- memory and CPU (show Activity Monitor)
Display concerns
- screen density
- resizing on Retina displays
- 100% vs 200% on dual screens
- consider a lower pixel density display for image evaluation
Initial assessment
- scan image for obvious defects from motion or lighting changes
- get a sense of which frames are going to be best for which areas
- refer back as needed while retouching.
- some focus stacks can trend to hopeless; address this in the field not in post for example longer exposures
Retouching
- top/bottom layout SHOW menu
- show Fit to Window
- if shot correctly and no motion, retouching can add sharpness in some areas at uniform distance due to lighting diffs, small shadows, etc
- moving subjects troublesome, eg the water and vertical trees
Overall step by step retouching
1. paint over the distance using knowledge from the Photoshop stack
2. paint over any appropriate areas with optimal frame
3. paint over moving subjects like trees if they "fit" within a particular frame near/far
4. Detail work left/right/left in bands
5. Save and open result in PS; scan for issues, repeat steps 1-4 as need and/or touchup smaller areas.
TIP: watch at 4K on a 5K display for greatest ease of viewing.